Step 4: Creating a tracker
A tracker is a small web page that can be embedded in a blog or VLE page which allows students to track how many challenges they’ve completed across a group of related self-marking python challenges.

If you’ve made your own self-marking python activity, you can use it on its own without creating a tracker. As soon as you’ve saved it (Ctrl + S for a new URL or Ctrl + Shift + S to overwrite an activity you’ve previously saved) students will be able to attempt your challenges.
Trackers are designed to allow you to group multiple activities together, to order them and to add names to describe them. Trackers also allow students to generate PDF certificates to demonstrate their progress.
In order to create a tracker, log in using your Google account and click on your profile icon. You should see a Create new tracker button.
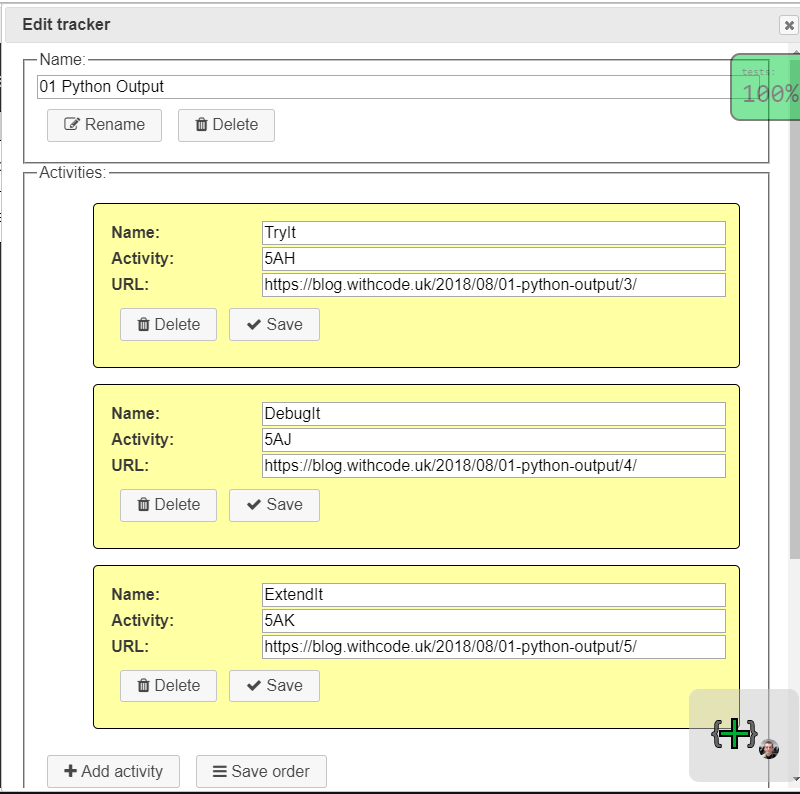
The example tracker (shown above) shows how you can set up a tracker to contain different self-marking challenges.
The yellow boxes represent individual self-marking python activities. If these activities have a tests.jsonfile then students progress will be tracked based on how many of those challenges they’ve completed on that computer.
Privacy / GDPR note:
It’s important to note that tracking is done locally, on the client computer. Student details are only sent to the withcode web server if they request a pdf certificate but they are not stored or used for any purpose other than generating that certificate. To be GDPR compliant, details are sent securely and the web server is in the UK.
Even if the python activities you add to a tracker don’t have a tests.json file students will still get credit for viewing the code and for running the code
Note:
Students sometimes find that they get 100% completing all the challenges on an individual python activity but the tracker says they have completed less than 100% of the tasks.
This is usually because they’ve forgotten to actually run their code (
Ctrl + Enter) to test their code themselves.
The activity field (e.g. 5AJ in the example above) is the last part of the URL of your saved python activity
The URL field (e.g. https://blog.withcode.uk/2018/08/01-python-output/4/ in the example above) is optional. It determines what the tracker links to if a students clicks on the activity name. If you leave it blank, the tracker will link directly to the python activity but you can customise it to link to your own blog or web page.
You can drag the yellow activities up and down to set the order that they appear in the tracker page.
I’m aware that there are plenty of things that are missing from this way of defining self-marking tests, but hopefully it’s enough to get you started. If you have any questions or ideas for new features, please get in touch and let me know.
[/et_pb_text][/et_pb_column] [/et_pb_row] [/et_pb_section]