Getting started
I’m using a laptop running Ubuntu for this experiment but all the software mentioned here is cross platform so you should be able to get it working on Windows / Mac.
- You’ll need to download the Arduino IDE from https://www.arduino.cc/en/Main/Software which will also install the necessary drivers if you’re on Windows / Mac so you can detect the device when you plug it in via a USB cable.
Your desktop / laptop can program and communicate with the device via a USB cable which works as a virtual serial port. On Ubuntu, when you plug in the USB cable, you get a new serial device appear as /dev/ttyUSB0
- My desktop user didn’t have the necessary privileges to access this file so I couldn’t write any programs until I ran the following in a console:
sudo adduser yourusername dialout
- Replace yourusername with whatever user you’re logged in as and then restart with
sudo shutdown -r now
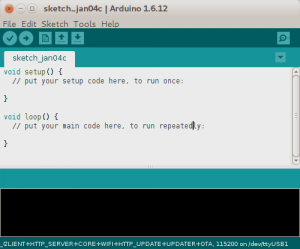
Next, load the Arduino IDE and you should see a code window as shown below (left):
The template code contains two functions: setup and loop
Any code you write inside the setup function will just run once. 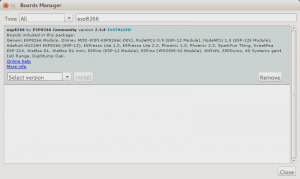
Any code you write inside the loop function will keep looping repeatedly until the device powers off.
The device I’ve got is based on a ESP-8266 chipset which has WiFi connectivity built in but you need to download some additional files before the Arduino IDE will recognise it.
- Click on File > Preferences and enter this URL into the Additional Board Manager URLs setting: http://arduino.esp8266.com/stable/package_esp8266com_index.json
- Now you should be able to click on Tools > Board > Board Manager and search for esp8266 so you can install the community plugin that lets you program ESP8266 devices (shown right). The version that worked best for me was 2.4.0-rc2
- Use Tools > Board to select whichever device you’ve got. After a little trial and error, these settings worked for me:
Board: WeMos D1 R2 & mini
Flash Size: 4M (3M SPIFFS)
CPU Frequency: 80MHz
Upload speed: 921600
Port: /dev/ttyUSB0 (this will be something like COM3 if you’re in Windows)




thank you very much for your help 🙂 I couldnt make it work without that
Hiyah!
The directional buttons: FLATH, RSET, D5, D6, D7
What on earth is FLATH?
Also – won’t RSET reset the board when the “direction” is pressed on the little joystick?
Yes, because of the way the joystick is connected up, the board will reset when you press left. I don’t know what FLATH is: it’s on all the description pages when you try to buy it but the joystick is actually connected to D3,D5,D6,D7 (and RSET). Maybe there’s a way to disable the reset-not sure-sorry!
I’m pretty sure FLATH is nothing but a typo from the first and original description (that has been copied wrongly every time)
This is the FLASH button. In order to FLASH another binary (firmware) this button has to be pressed while turning power ON.